Easy DIY Mother’s Day Pop-Up Flower Card
DIY Happy Mother’s Day Card with Pop Up Flower creations are such a wonderful way to show your love! Imagine a beautiful card, and as your mom opens it, a vibrant, three-dimensional flower blooms right out from the center, adding a playful and heartfelt surprise. This project is perfect for complete beginners, creative kids, and anyone looking for a thoughtful, handmade gift. You can expect this delightful card to take around 20-30 minutes to fold and assemble.
In this tutorial, I’ll guide you step-by-step through the simple folds needed to create both the card base and the eye-catching pop-up flower. We’ll learn how to transform a single sheet of paper into a stunning floral surprise, making this Mother’s Day truly memorable. Let’s get folding!
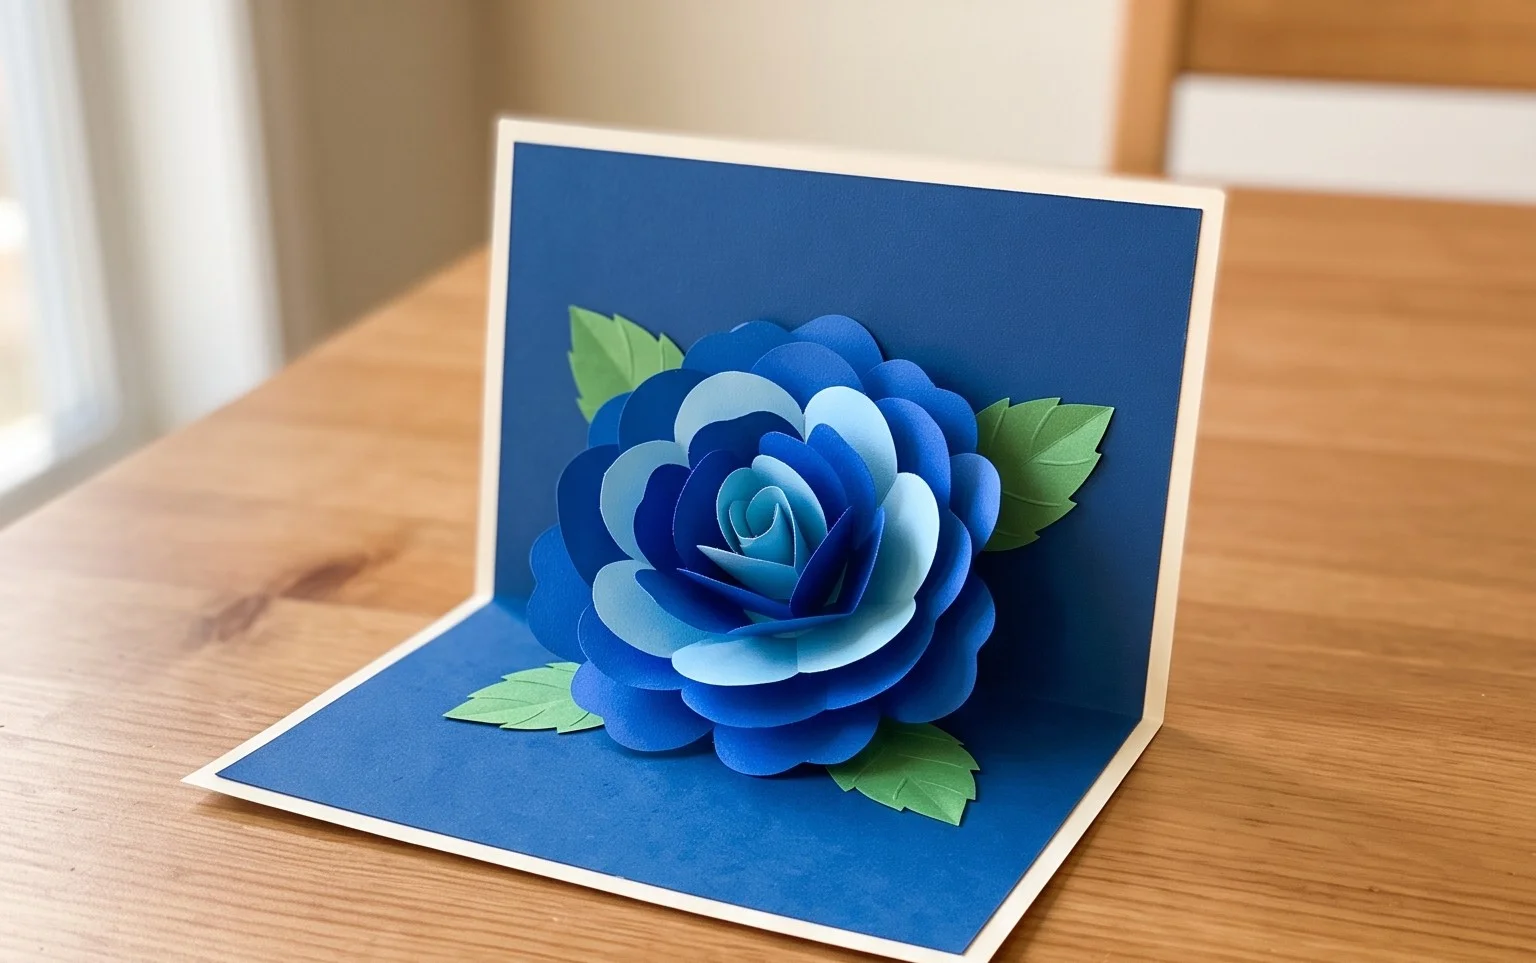
This tutorial will guide you through creating a beautiful and heartfelt DIY Happy Mother’s Day card with a delightful pop-up flower. It’s a wonderful way to show your appreciation with a personal touch that’s both charming and memorable. We’ll break down each step so that even if you’re new to origami, you can create something truly special.
Choosing Your Paper: The Foundation of Your Origami Flower Card
The paper you choose is crucial for both the look and the foldability of your origami. For this project, I recommend a medium-weight paper.
Paper Type and Weight
* Origami paper is ideal because it’s specifically designed to hold creases well and is often thin enough for intricate folds, yet strong enough not to tear easily. Standard origami paper is usually around 60-80 gsm (grams per square meter).
* If you don’t have origami paper, a good quality cardstock alternative is printer paper (around 80 gsm). Avoid very thick cardstock, as it can be difficult to fold cleanly and will make the final card bulky. Also, steer clear of very thin paper like tracing paper, as it won’t hold its shape well.
Paper Size
* For the flower itself, a square piece of paper is best. A good starting size for a beginner is 6 inches by 6 inches (approximately 15 cm x 15 cm). This size is manageable for learning the folds and produces a flower that’s a nice, noticeable size for a card.
* For the card base, you’ll need a larger piece of paper. I suggest using a standard A4 or US Letter size piece of paper (8.5 x 11 inches or 21 x 29.7 cm). This will allow you to create a folded card with plenty of space for your pop-up flower and a message.
Single or Double-Sided Paper
* For the flower, I highly recommend using single-sided colored origami paper. This way, you get a vibrant color on one side and a clean white or complementary color on the other. This contrast can add a subtle visual interest to your flower. However, if you only have double-sided colored paper, that will work perfectly too!
* For the card base, you can use any paper you like. A plain white or cream paper provides a classic look, while a patterned paper can add extra personality.
The Base Folds: Preparing Your Paper for the Flower
Before we dive into the intricate folds of the flower, we need to make some fundamental creases on our square piece of paper. These are the building blocks for many origami models.
Step 1: Diagonal Fold
Start with your square piece of paper, colored side up if using single-sided paper. Bring the bottom right corner up to meet the top left corner. Make a firm crease along the edge where these two corners meet. Then, unfold the paper. You should now have a diagonal crease running from the top left to the bottom right.
Step 2: Second Diagonal Fold
Now, with your paper still flat, bring the bottom left corner up to meet the top right corner. Crease firmly along this edge. Unfold the paper again. You should now have two diagonal creases forming an ‘X’ on your paper.
Step 3: Horizontal Fold
Flip your paper over so the colored side is now facing down. Bring the bottom edge up to meet the top edge. Crease firmly along this horizontal line. Unfold the paper.
Step 4: Vertical Fold
With the paper still flat and the colored side down, bring the left edge over to meet the right edge. Crease firmly along this vertical line. Unfold the paper. You should now have four creases: two diagonals forming an ‘X’ and one horizontal and one vertical crease forming a ‘+’.
Step 5: Creating the Waterbomb Base
This is where things get a little magical! With the colored side still facing down, gently push in the left and right sides of the paper along the vertical crease. As you do this, the top and bottom edges will naturally want to come together. Guide the top point downwards to meet the bottom point. You should now have a triangle shape, with four layers of paper. This is called the Waterbomb Base. Make sure all the edges are neatly aligned.
The Flower Fold Sequence: Bringing Your Pop-Up Flower to Life
Now that we have our Waterbomb Base, we can start forming the flower. Take your time with each step, and don’t be afraid to gently adjust the paper.
1. **Prepare the Base:** Place your Waterbomb Base so the open edges are pointing towards you. You should have two flaps on the right and two flaps on the left.
2. **Fold the Right Flaps:** Take the top right flap and fold its bottom edge up to meet the center vertical crease. Crease firmly. Repeat this with the flap directly underneath it (the second flap from the right). You should now have two angled folds on the right side, meeting in the middle.
3. **Fold the Left Flaps:** Now, take the top left flap and fold its bottom edge up to meet the center vertical crease. Crease firmly. Repeat this with the flap directly underneath it (the second flap from the left). You should now have two angled folds on the left side, meeting in the center. Your paper should now resemble a kite shape on each side, with the pointed ends meeting at the top.
4. **Fold the Top Points Down:** Take the top point of the entire model and fold it down so it meets the base of where the angled folds meet in the center. Crease firmly. This fold will create a new horizontal crease.
5. **Unfold the Angled Folds:** Now, gently unfold the four angled folds you made in steps 2 and 3. You’ll be left with the creases.
6. **Petal Fold (Right Side):** This is a crucial step. Look at the right side of your model. You have the horizontal crease from step 4. You’re going to use this crease to create a petal. Gently lift the top layer of paper on the right side. You want to fold it upwards along the existing creases so that the sides of the ‘kite’ shape you unfolded in step 5 tuck inwards, and the top point comes up. Essentially, you are reversing the fold you just made. The two side edges that were previously angled in will now come up to meet the center line again, and the horizontal crease will form the top of your petal. Press down to flatten.
7. **Petal Fold (Left Side):** Repeat step 6 on the left side. You will gently lift the top layer of paper and fold it upwards, tucking the sides inwards along the creases, to form the second petal.
8. **Flip and Repeat:** Flip your entire model over. You should see the two symmetrical folds on this side. Repeat steps 2 through 7 on this side to create the other two petals of your flower.
9. **Shape the Flower:** You should now have a flower shape with four petals. Gently open up the center of the flower. You can lightly curl the edges of the petals outwards if you wish to give your flower a more rounded, natural look.
Adding the Pop-Up Mechanism to Your Card
Now that your flower is folded, let’s integrate it into a card.
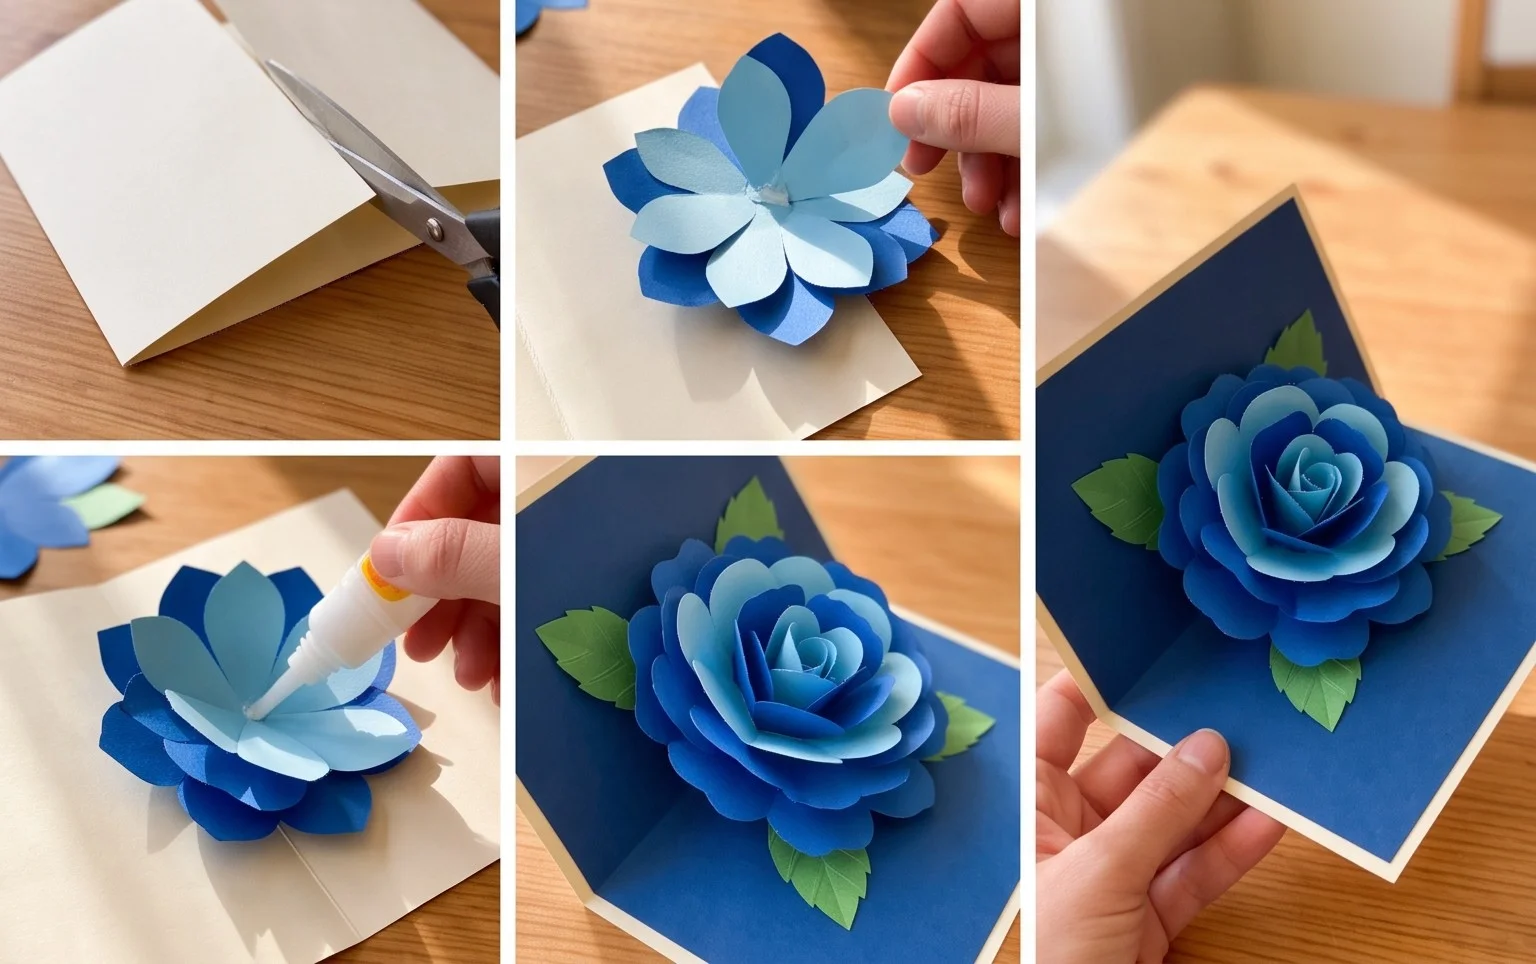
1. **Prepare the Card Base:** Take your A4 or Letter-sized paper and fold it in half horizontally to create a standard folded card. Make a crisp crease.
2. **Mark the Flower Placement:** Decide where you want your pop-up flower to appear when the card is opened. On the inside of the card, lightly mark two parallel lines about the width of your folded flower. These lines should be about two-thirds of the way down from the top fold of the card.
3. **Cut the Slots:** Carefully cut along these two marked lines. These are your “slots” for the flower to pop up from.
4. **Attach the Flower:** Place your folded origami flower on the front of the card, ensuring the base of the flower is positioned so that when the card is opened, it will fit snugly into the slots. You can then use a small amount of glue or double-sided tape to attach the flower to the front of the card. Don’t use too much glue, just enough to secure it.
5. **Insert the Flower:** Gently open the card. You should be able to carefully slide the bottom of the flower into the two slots you cut. Once it’s in place, close the card gently. The flower should now be held securely and pop up when the card is opened.
Common Beginner Pitfalls and How to Avoid Them
Even experienced folders make mistakes sometimes, so don’t get discouraged! Here are a couple of common areas where beginners often stumble:
1. Unclean Creases
* **The Problem:** Folds that aren’t sharp and precise. This can make the final model look messy and can also make subsequent folds more difficult, as the paper doesn’t align as it should.
* **How to Avoid It:** Use your fingernail or a bone folder (if you have one) to really press down and sharpen every crease. Make sure you align the edges and corners perfectly before making the crease. A good, clean crease is foundational for almost all origami.
2. Forgetting to Flip or Incorrectly Reversing Folds
* **The Problem:** In steps 6 and 7 (the petal folds), it’s easy to get confused about which way the paper should be folded. If you don’t reverse the initial folds correctly, the petal won’t form properly.
* **How to Avoid It:** Pay close attention to the language describing the petal fold. You are essentially ‘opening up’ what you just folded down and tucking the sides in. Imagine you are gently lifting the top layer and letting the internal creases guide it into a new shape. If the petal looks stiff or doesn’t look like a petal, you might have folded it the wrong way. Gently unfold and try again, paying close attention to how the existing creases guide the paper.
### 3. Incorrect Slot Cutting for the Pop-Up
* **The Problem:** The slots for the flower are cut too far apart, too close together, or at an angle. This can result in the flower not fitting securely or not popping up correctly.
* **How to Avoid It:** Before cutting, place your folded flower on the card and get a good visual of how much space it occupies when closed. Mark your lines lightly and measure them to be slightly less than the width of your flower’s base. When cutting, try to keep the cuts as parallel as possible. Don’t cut too deep into the card, just enough to create a secure hold.
Varying Your Origami Flower Card: Making it Uniquely Yours
The beauty of origami is its adaptability! Here are some ways you can customize your Mother’s Day card:
Size Variations
* **Smaller Flower:** Use a smaller square of paper for the flower (e.g., 3 inches x 3 inches). This will result in a daintier pop-up. You might need to adjust the size of your card base accordingly.
* **Larger Flower:** Use a larger square of paper for the flower (e.g., 8 inches x 8 inches). This will create a more dramatic pop-up. You’ll definitely need a larger card base for this.
Paper Pattern and Color
* **Patterned Paper:** Experiment with patterned origami paper for the flower. Floral patterns, polka dots, or even geometric designs can add a unique flair.
* **Color Combinations:** Use different colored papers for each petal by carefully piecing them together before folding, or by using multi-colored origami paper.
* **Card Base Colors:** Don’t limit yourself to white or cream for the card. Try pastel colors, bolder shades, or even textured paper for the card itself.
### Adding Extra Embellishments
* **Handwritten Message:** The most personal touch is a heartfelt, handwritten message inside the card.
* **Embellishments:** You can glue small beads, glitter, or even tiny fabric flowers onto the origami flower for added sparkle and dimension.
* **Leaves:** Fold small green origami leaves and attach them to the stem of the flower or around the base of the pop-up on the card.
Displaying and Gifting Your Creation
This origami card is more than just a greeting; it’s a small piece of art.
Display Ideas
* When your loved one opens the card, the pop-up flower will stand proudly. Encourage them to place it on a desk or shelf where it can be admired.
* If the flower detaches or is made as a separate piece, it can be placed in a small bud vase.
Gifting Ideas
* **Accompanied by a Gift:** This card is a perfect accompaniment to a bouquet of real flowers, a thoughtful gift, or even a homemade treat.
* **As a Standalone Gift:** For someone who appreciates handmade items, this card can be a meaningful gift in itself, especially if accompanied by a sincere message.
* **Framed:** You could even carefully remove the flower after it’s been admired and frame it with the card for a lasting keepsake.
Creating this pop-up flower card is a rewarding experience. Take your time, enjoy the process, and remember that the love and effort you put into it are the most important ingredients. Happy Mother’s Day!
Conclusion
Congratulations on creating your very own DIY Happy Mother’s Day card with a pop-up flower! We hope you enjoyed this fun and rewarding paper craft. Remember, your first attempt is always a learning experience, so don’t be discouraged if it’s not perfect. The joy is in the making and the love you pour into it!
We’d love to see your beautiful creations! Feel free to share your finished origami card with your loved ones or on social media using #OrigamiLove. For your next creative adventure, try making a different colored pop-up flower or perhaps a pop-up heart to accompany your message. Keep exploring the wonderful world of paper projects with us – there’s always something new and exciting to fold!
